
How to use camera step by step:
📌 Introduction
This step-by-step camera guide is perfect for beginners learning how to use a mirrorless camera.
Struggling with camera settings like ISO, aperture, and shutter speed? You’re not alone.
Many beginners feel confused when they first use a mirrorless camera. But once you understand the basics, photography becomes simple and fun.
👉 In this guide, you’ll learn:
- How to use a mirrorless camera step-by-step
- Best beginner settings
- Common mistakes to avoid
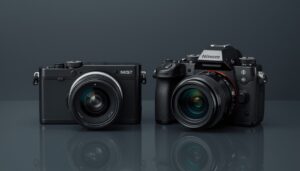
📷 What is a Mirrorless Camera?
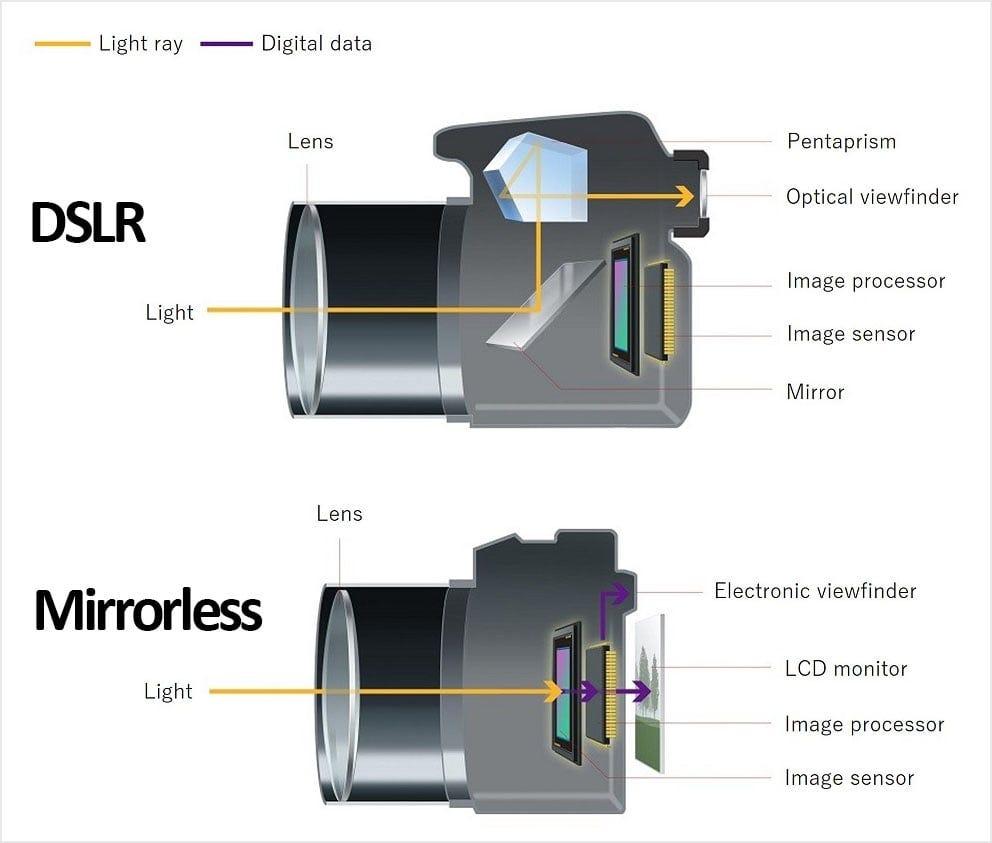
A mirrorless camera is a digital camera that does not use a mirror like DSLRs. Instead, it uses an electronic viewfinder to display the image.
✅ Why mirrorless cameras are great for beginners:
- Lightweight and easy to carry
- Faster autofocus
- Excellent for video and YouTube
- Modern features and better performance
👉 In short: Mirrorless cameras are perfect for beginners, content creators, and photographers.
Learn more about DSLR Camera Vs Mirrorless Camera
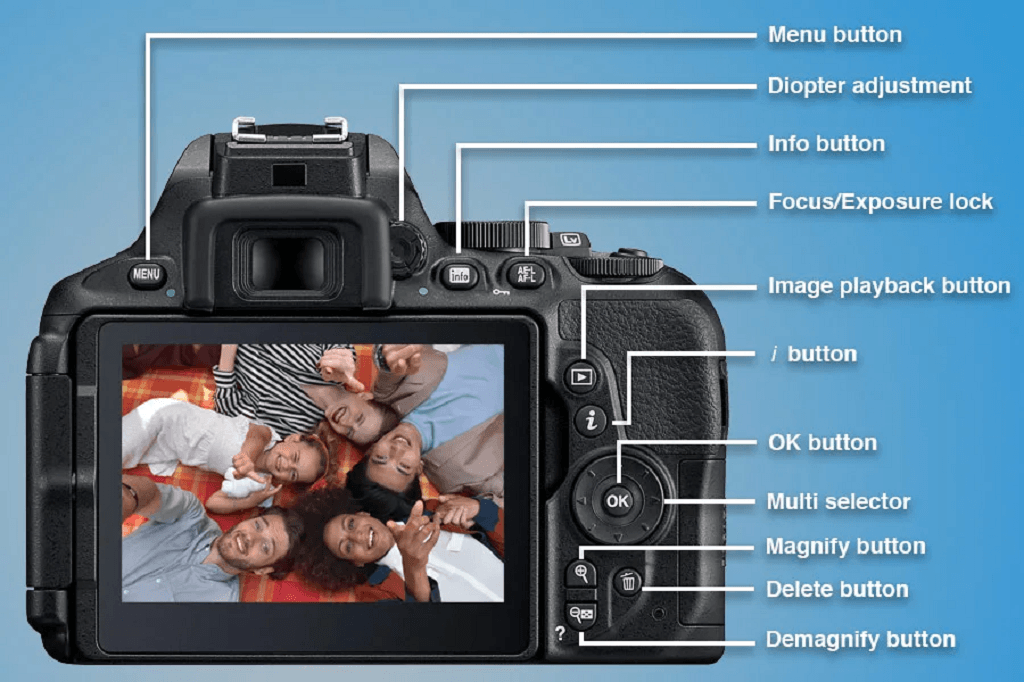
🔧 Basic Parts of a Camera (Beginner Friendly)
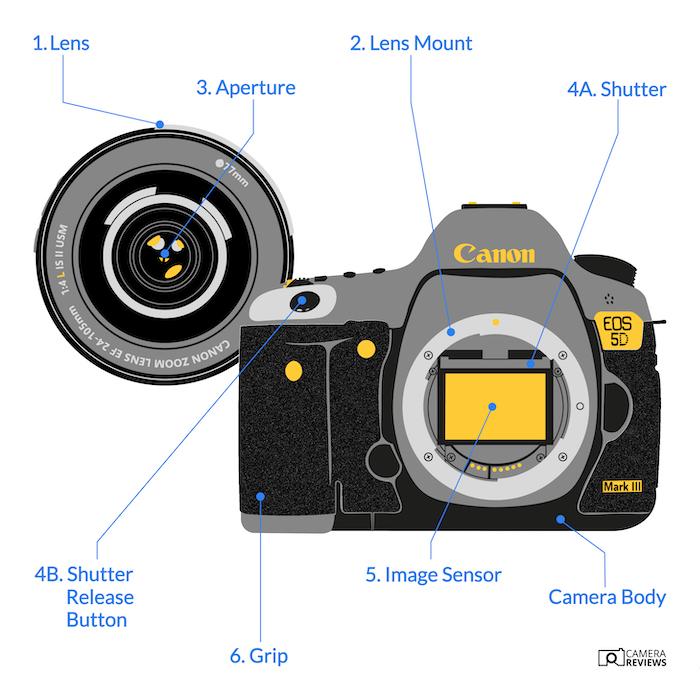
Before you start shooting, it’s important to first understand a few essential parts of your camera so you can use it more effectively. This will help you use it more confidently and get better results:
🔘 Mode Dial
Lets you switch between:
- Auto Mode (easy)
- Aperture Priority (A/Av)
- Manual Mode (M)
📸 Shutter Button
Press halfway to focus, fully to take a photo.
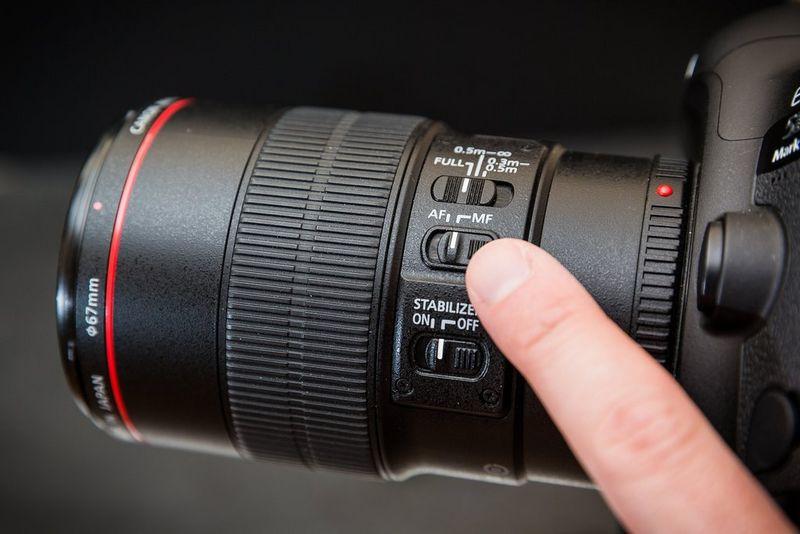
🔍 Lens & Zoom Ring
Controls zoom and focus.
📺 LCD Screen
Shows your image preview and settings.
📋 Menu Button
Access camera settings.
👉 Don’t worry about mastering everything—just get familiar with these basics first.
🔺 Exposure Triangle (Core Concept)
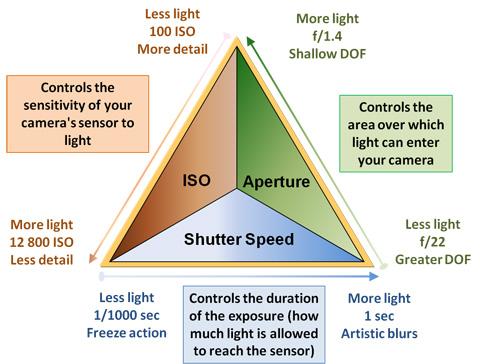
Understanding this will instantly improve your photos.
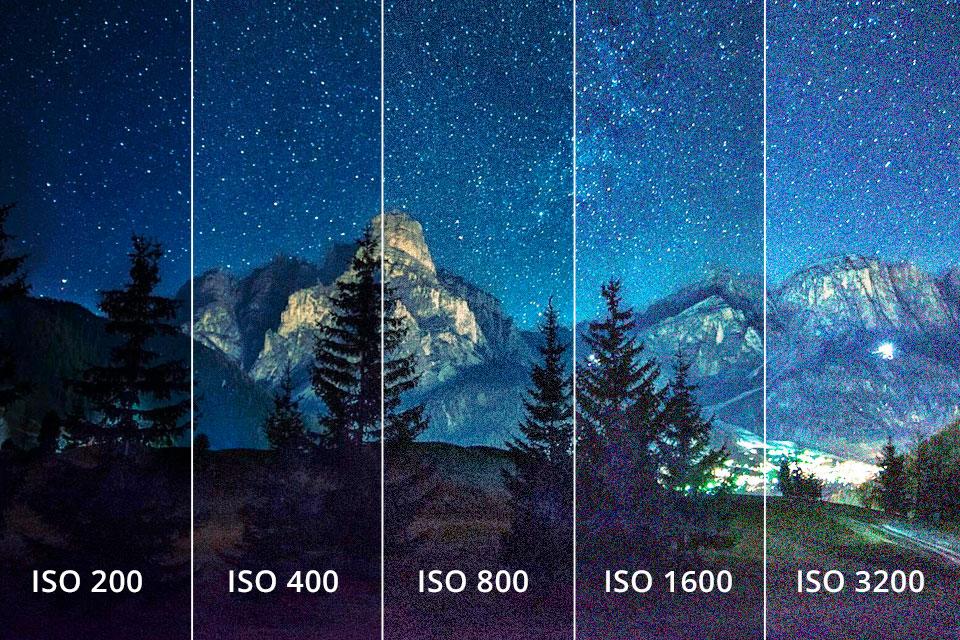
📌 ISO (Brightness Control)
- Low ISO (100–200): Clean image
- High ISO (800+): Brighter images; however, it can also introduce grain (noise).
🔥 Aperture (Background Blur)
- Low f-number (f/1.8): Blurry background (bokeh)
- High f-number (f/8): Everything sharp
📌 Shutter Speed (Motion Control)
- Fast (1/1000): Freeze motion
- Slow (1/30): Motion blur
👉 Think of it like this:
- ISO = light sensitivity
- Aperture = blur control
- Shutter = motion control
❓ What is ISO in Camera?
ISO in a camera controls how sensitive your camera is to light.
- Low ISO (100–200) → Clear and sharp images (best for daylight)
- High ISO (800+) → Brighter images but can add grain (noise)
👉 In simple terms:
ISO = brightness of your photo
📸 Example:
- Shooting outdoors → Use ISO 100
- Shooting indoors → Use ISO 800 or higher
🎯 Pro Tip for Beginners
👉 Always try to keep ISO as low as possible
👉 Increase it only when there is less light
❓ What is Aperture in Photography?
Aperture is the opening inside your camera lens that controls how much light enters the camera.
- Low f-number (f/1.8) → More light, blurry background (bokeh)
- High f-number (f/8 or higher) → Less light, everything sharp
👉 In simple terms:
Aperture = background blur + light control
📸 Example:
- Portrait photos → Use f/1.8 (blur background)
- Landscape photos → Use f/8 (sharp details)
🎯 Pro Tip for Beginners
👉 Use low aperture (f/1.8–f/2.8) for portraits
👉 Use high aperture (f/5.6–f/8) for group or landscape photos
⚡ Easy Way to Remember
f/8 → sharp image
f/1.8 → blurry background
❓ What is Shutter Speed in Photography?
Shutter speed is the amount of time your camera sensor is exposed to light when taking a photo.
- Fast shutter speed (1/1000) → Freezes motion (sharp image)
- Slow shutter speed (1/30 or slower) → Creates motion blur
👉 In simple terms:
Shutter speed = motion control
📸 Example:
- Sports photography → Use 1/1000 (freeze action)
- Night photography → Use 1/10 or slower (light trails effect)
🎯 Pro Tip for Beginners
👉 Use fast shutter speed for moving subjects
👉 Use slow shutter speed + tripod for creative effects
⚡ Easy Way to Remember
Slow = Blur motion
Fast = Freeze motion
🎯 Want better photos faster?
⚙️ Best Camera Settings for Beginners
Camera settings for beginners:

Start simple. Don’t jump into manual mode immediately.
Best Camera Settings for Beginners
| Setting | Recommended |
|---|---|
| Mode | A/Av |
| ISO | Auto |
| Autofocus | Continuous |
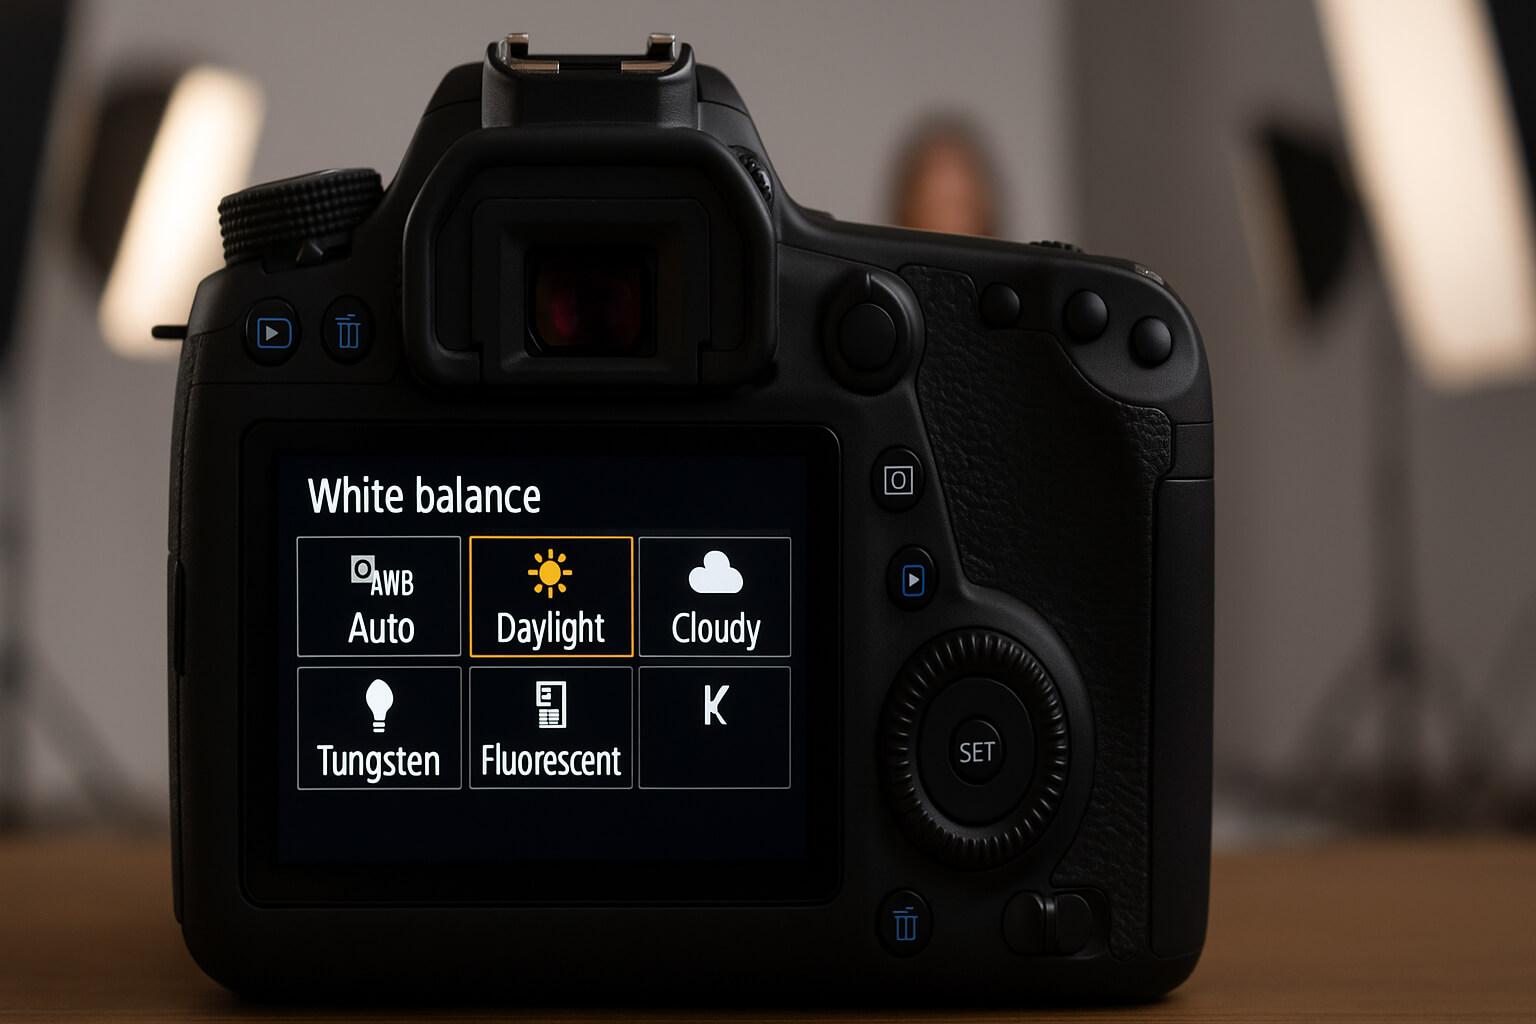
| White Balance | Auto |
👉 This setup gives you control without complexity.
📸 How to Take Your First Photo (Step-by-Step)
Beginner photography tips:
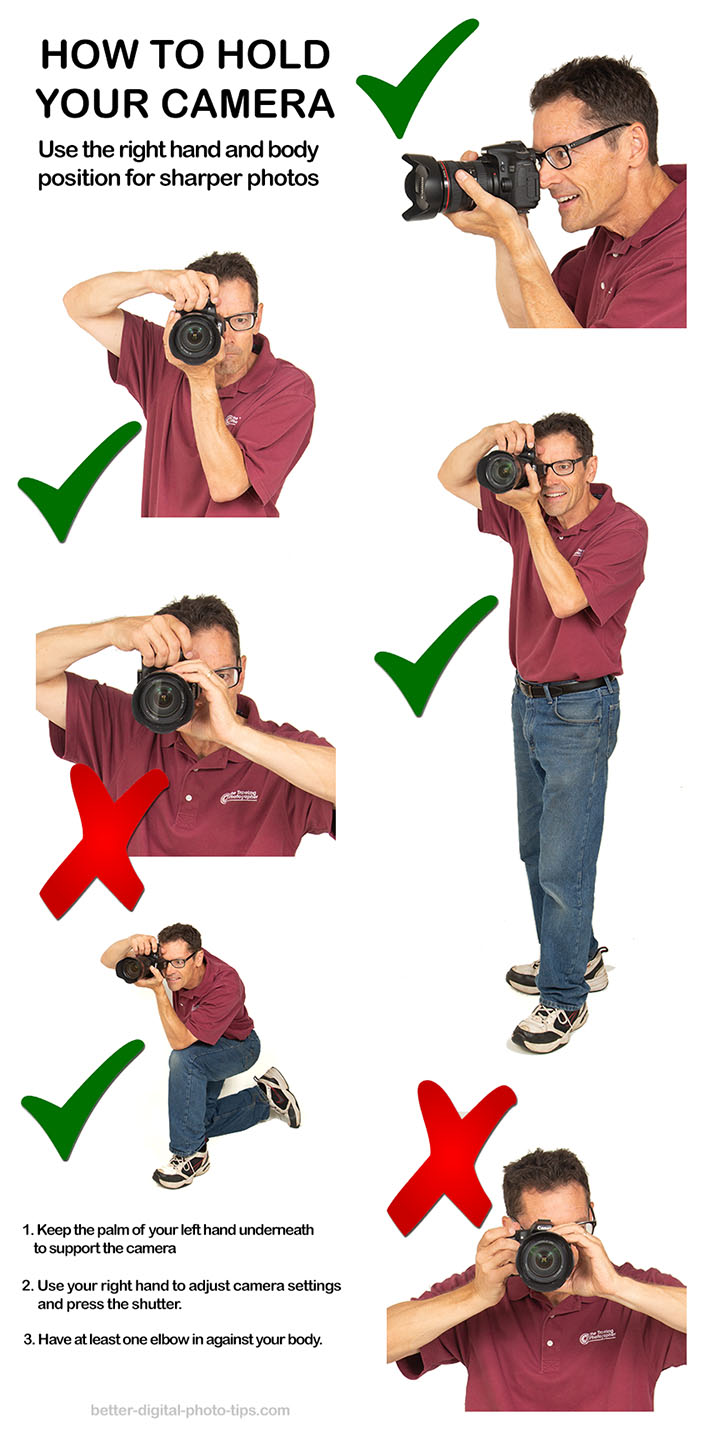
Follow this simple process:
- Turn on your camera
- Set mode to Auto or A/Av
- Frame your subject
- Half-press shutter to focus
- Fully press to capture
👉 That’s it—you’ve taken your first photo!
❌ Common Beginner Mistakes
❌ Blurry Photos
Cause: Slow shutter speed
Fix: Use faster shutter or tripod
❌ Too Bright or Dark Images
Cause: Incorrect exposure
Fix: Adjust ISO or exposure compensation
❌ Out-of-Focus Shots
Cause: Wrong autofocus mode
Fix: Use single-point or continuous AF
❌ Grainy Photos
Cause: High ISO
Fix: Lower the ISO when possible to reduce noise and improve image quality.
🎥 Basic Video Settings
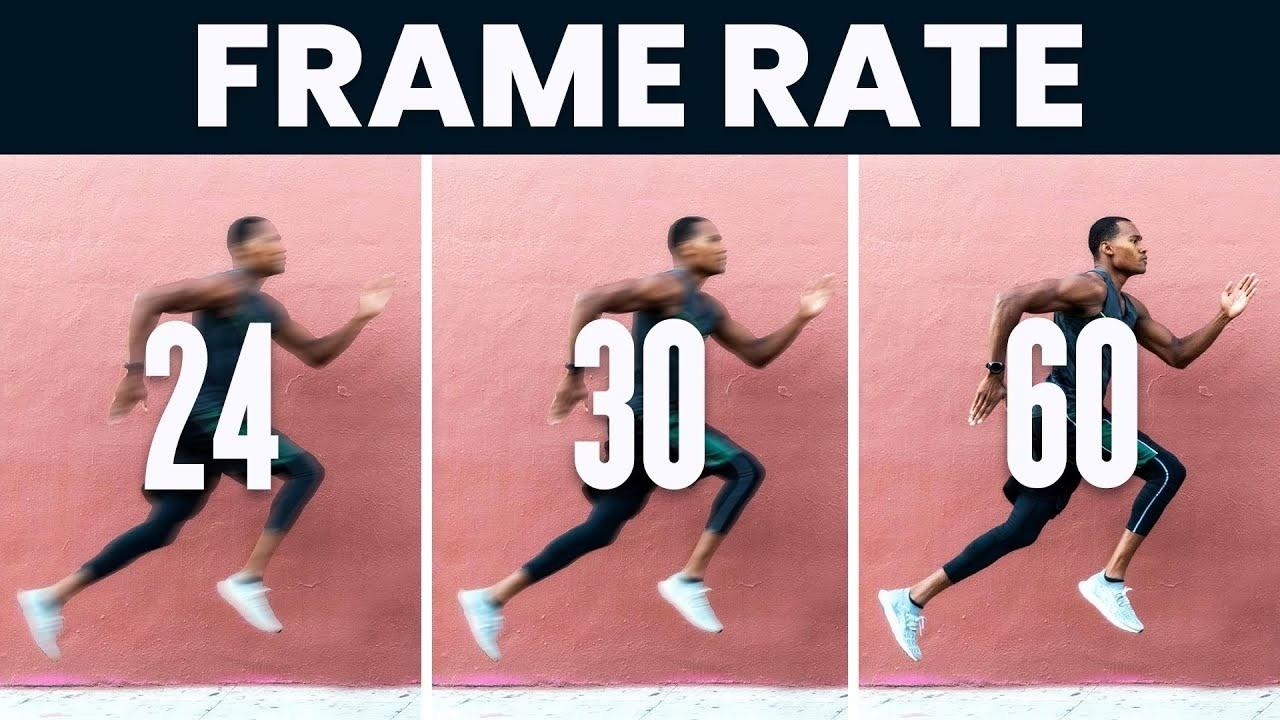
If you want to shoot videos, here are a few basic settings to get started:
- Use 24fps for cinematic look
- Use 30fps for normal videos
- Keep camera stable (use tripod)
👉 Mirrorless cameras are excellent for YouTube and content creation.
❓ Frequently Asked Questions (FAQs)
Yes, they are easy to use and offer modern features.
Start with Auto, then move to Aperture Priority.
No, even budget mirrorless cameras are great for beginners.
Absolutely! Many creators use them for high-quality videos.
🔚 Conclusion
Now you know the basics of using a mirrorless camera—from settings to shooting your first photo.
Start simple, practice regularly, and don’t be afraid to experiment.

Article is good for beginners like me. It’s help me to setup my camera’s setting.